In addition to securely erasing hard drives KillDisk also allows you to write an image or copy a Master Disk to
newly erased hard drives with its cloning feature.
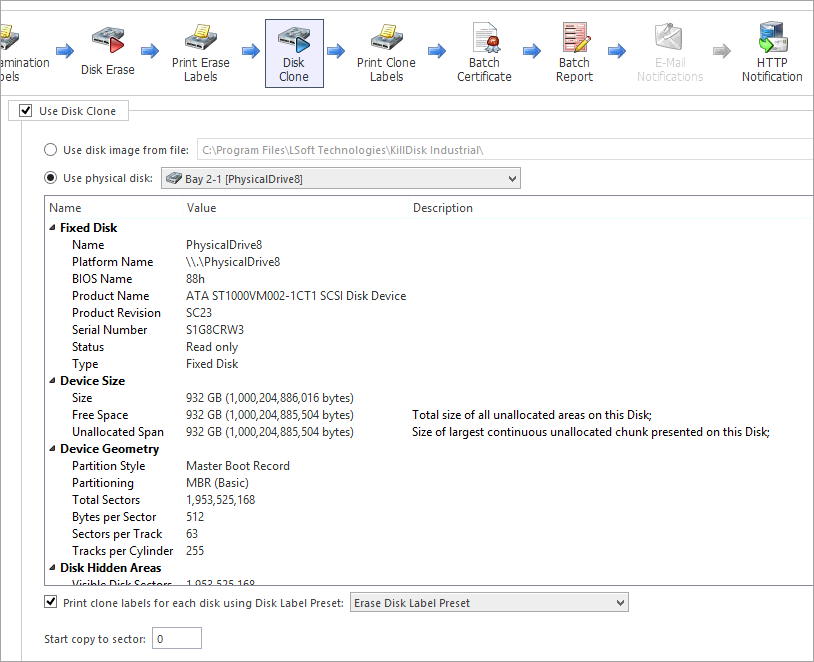
To clone a disk (or image to a disk) navigate to the Disk Clone tab when you edit existing Erase Batch or
create a new EraseBatch and check the Use Disk Clone box, as shown below.
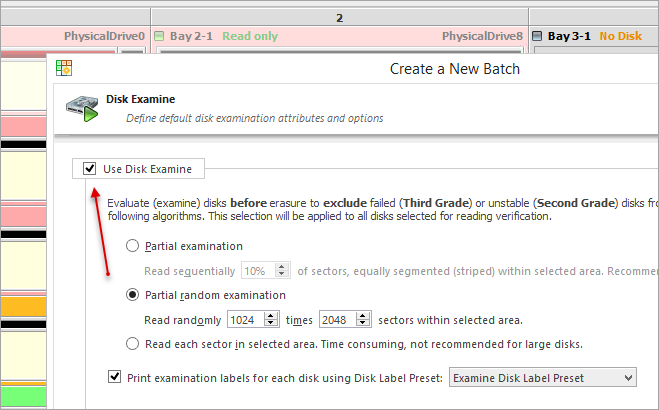
Important: Make sure the Use Disk Examine option is selected on Disk Examine page (as shown below). Otherwise Disk Clone
option is avoided in this Wizard as well as in Batch Editing.
An existing disk image or physical hard drive can be used as the Master Copy to be cloned to the newly erased drive. For
additional preferences and configuration see Clone Sources.
To configure a source image/disk for Disk Clone operation in Erase Batch:
Navigate to the Disk Clone tab in the Erase Batch settings and check the Use Disk Clone checkbox
Select the disk image source from either image file or
physical disk.
Specify which sector to start the copy to. If unsure leave as '0'.